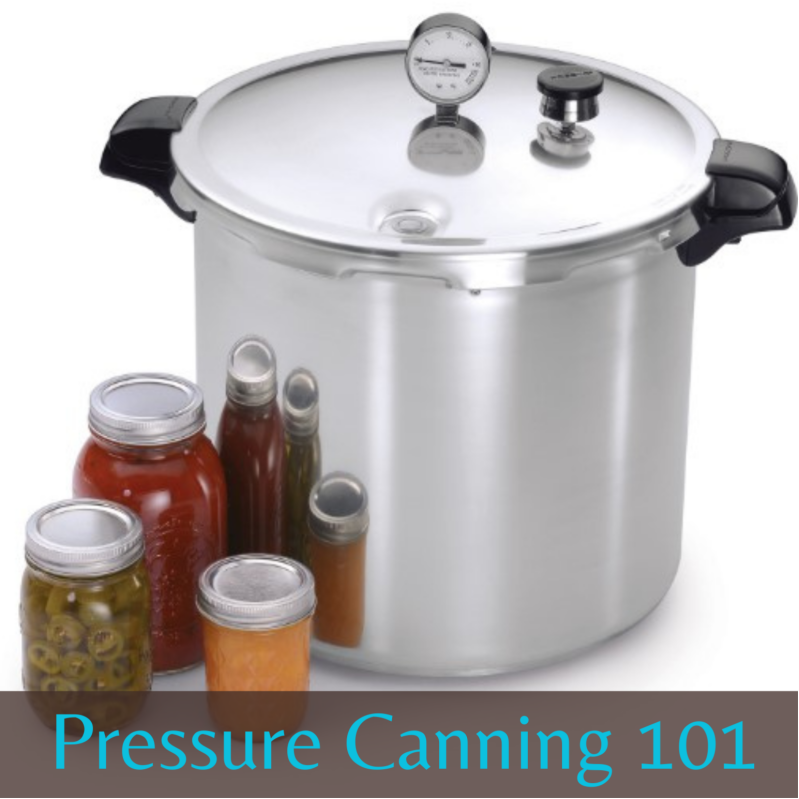
Pressure canning is a popular method of food preservation. To some, the idea of pressure canning is daunting and scary. Many times this is due to not knowing the very basics, and not following safe procedures. In this post, I will cover the basics of pressure canning. Everything, from the parts of the canner, maintenance, what foods need to be pressure canned, types of pressure canning and some often unknown canning terms. My goal is to educate, so if you have never laid your hands on a pressure canner before, after you read this post, you will be familiar with how it works, and know how to follow a recipe for canning!
Before You Start:
Parts and Maintenance of the Canner:
Let's get to know your canner before we start canning anything.
All canners have a base or body, this is where you place the jars for processing. Within that body there should be a rack to keep the jars off the bottom of the body. Each brand of canner has a slightly different lid design, however they all work basically the same. The lid must fit correctly on the body of the canner to ensure a proper seal is made so pressure can safely build inside the canner. The lid of the canner will have a vent, a safety valve and some will have a dial for the pressure. Some canners have a general weight (those usually have dials) and some canners have a specific weights used for different pressures needed. Each canner lid will have a specific way to secure it to the body. You need to read and follow the manufacturer's instructions on how to properly secure your canner lid to the body.
Now let's break down the parts of the canner for you.
Body:
The body of the canner will have a heavy bottom, and tall walls. Before canning, always make sure the bottom of the body is flat. A canner with a bottom that is warped at all is not safe to use. There are different styles of handles for some canners, and some handles are part of the lid securing system. Before canning, always check to make sure the handles are secured tightly to the body of the canner. If they are loose, then secure them by tightening the screw within the handle. A loose handle could mean disaster when you are ready to empty the canner of the used water.
There should always be a jar rack used in the body of the canner. This prevents the jars from sitting directly on the bottom of the body and has several benefits. It can prevent jar breakage, by holding the jars off the bottom and allowing the boiling action of the water to not tip the jars over. It can prevent burning of food inside the jars, by allowing a space for water to flow under the jars, so they are not in direct contact with the heat on the canner. It allows for even pressurization, by allowing the water and steam to flow all around the jars, and not just around the body and tops of the jars.
If your canner is tall enough to allow for stacking of pints (follow manufacturer's instructions), it is a good idea to purchase an extra jar rack to safely stack the jars. Without it, it becomes a balancing act of placing jars on top of jars. I was not comfortable with this, although many canners do this with no issue.
When canning, it is recommended to fill the canner with approximately 2-3 inches of water for the processing. Check your canner's manual to follow exact recommendations. You do not want the water to cover the rings and lids of the jars, it only needs to come half-way up the jar or so.


The Lid:
The lids of canners vary according to manufacturer. I have included some diagrams of the most common lids with parts used (see above).
All lids will have a locking mechanism, whether it is wing nut cover locks, like what is featured on the All American, or if its the more typical slot and groove lock, like featured on so many other brands. It is very important to follow the manufacturer's instructions on how to properly secure the lid of your canner to the body.
Most canner lids will have a gasket, the All American does not, this gasket needs to be checked for any cracks, breaks or signs of dry rot each time the canner is used. Gaskets are readily available through the manufacturer, or on Amazon, and they are affordable. I feel it is always a good idea to have an extra gasket on hand. It is very upsetting when you are ready to can something and find the gasket on your canner needs to be replaced, and you don't have one!
More safety features on the canning lid is the cover lock and the safety fuse or overpressure plug. When pressure is built up inside the canner, the cover lock pops up and prevents the lid from being opened. The safety fuse, or overpressure plug is typically a rubber piece in the top of the lid, and is designed to release pressure by popping out of the lid. This prevents the canner from exploding from too high of pressure.
All lids will have a vent pipe. This is a small pipe in the top of the lid that releases steam and where the weight is placed for processing. Before canning, check this pipe to make sure there isn't a blockage of any kind. Simply hold the lid to a light and look through the vent pipe. If there is a blockage, follow the manufacturer's instructions on how to clean it. It is very important to allow the canner to "vent" (a full steady flow of steam flowing from the vent pipe) for 10 minutes before placing the weight on when canning. This removes extra air and assures the correct pressure is being reached for food preservation safety.
Some lids will have a pressure dial gauge. This analog dial shows the pressure inside of the canner, it helps eliminate guesswork and allows accurate canning at specific pressures. If a dial like this is on your canner, you need to have it checked before the first use, and every year to assure it is reading pressure correctly. A one or two pound difference in pressure can mean the lack of safety in your pressure canned foods!
Weights:
No matter what brand of canner you have, you will use a weight. A weight sits on top of the vent pipe and controls how much steam is released based on how much pressure is built up in canner.
Canners with tested dial gauges can use the 15lb weight shown below on the left. The analog dial will show how many pounds of pressure is built up inside the canner. When the pressure reaches 15lbs, it will gently rock back and forth, releasing steam as it rocks. When pressure canning at sea level (10lb pressure), this allows for a very quiet canning experience since it will not be rocking and releasing steam at the recommended pressure.
For canners without tested dial gauges, or for those who prefer to not depend on them, there are several styles of weighted gauges to choose from. Below, the center and right picture show two of these commonly used styles. Both use the same concept of setting the pressure at 5lbs, 10lbs or 15lbs pressure. These weights will jiggle and release steam as they jiggle at the required weight. If the jiggling becomes too aggressive, you know the pressure is building too high and the heat needs to be lowered slightly. Follow the manufacturer's instructions on how to tell when you have reached the proper pressure using these types of weights.

15lb weight. This is commonly used with canners with dial gauges. Only gently rocks when pressure reaches 15lbs.

Weighted gauge. This piece has 3 weight settings on it, 5lb, 10lb and 15lb. Set the weighted gauge on vent pipe with desired pressure selected.

Three piece weight. Just the base of this weight is for 5lb pressure, each additional disk added, ads 5lbs so you have 5lb, 10lb and 15lb selections.
The required pounds of pressure needed for canning is based on altitude. Check your recipe you are using for recommended pounds of pressure (these are usually for 0-1000ft) then adjust accordingly with your altitude. Use the chart below for reference.

Which Foods to Pressure Can and Which Not to:
Pressure canning is used to safely preserve a wide variety of foods. Meats, vegetables, soups and more can be made into shelf-stable pantry items simply by following safe tested recipes and processing times. Foods that are low in acid need to be pressure canned. Basically everything besides most fruits, jams, jellies and tomatoes. By processing these foods in a pressure canner it allows the temperature in the jar to reach 240-250' F. Boiling water alone can never go above 212' F. The only way water can go beyond the boiling point is to be converted into steam. The pressure canner creates an environment that allows the steam to be created and held in confined space, thereby increasing the temperature within the canner. Pressure canning these foods allows the pressure inside the canner to increase the temperature inside the jar to the required temperature to kill the botulism bacteria, that can thrive and cause serious illness if not processed correctly.
Recipes for pressure canning that are tested and proven safe guarantee that the food you have worked hard to preserve will have the best quality, flavor and texture when you use them. Using unproven recipes can lead to off flavors, poor quality - even sickness - and poor texture when used. Always follow a safe tested recipe and procedure for canning your foods.
Some foods that are never safe to can are:
- Dairy items - no safe home preservation way to process dairy items to guarantee safe consumption when opened
- Pasta items or starchy sauces - starchy foods can interfere with the heat transfer within the jar, making it unsafe to eat
- Eggs - store bought canned eggs are manufactured with commercial equipment, home canning equipment is not suitable for this
- Dense foods like purees or mashed potatoes - these food should not be canned, the density of the product prevents even heating
- Tender foods like broccoli, squash and eggplant - these foods would not be an edible consistency after processing
Types of Pressure Canning:
There are two main types of pressure canning, raw pack and hot pack. These terms refer to how the product is jarred before placing in the canner for processing. It is important to follow the recipe directions on whether it is supposed to be raw packed or hot packed. The processing time and canner preparation are taken into consideration with each method.
Raw Pack (or Cold Pack):
The raw pack method is very simple, and used quite commonly with canning of vegetables and meat. With raw packing, you place the food items in the jars uncooked. Often this is done with vegetables that will be overcooked if they are cooked before processing. With meat, it allows the natural juices of the meat to surround the food in the jar since no liquids need to be added to the meat before processing.
When raw packing, the water in the canner does not need to be very hot, just warm to the touch, to avoid a temperature shock to the jars.
To raw pack, you will fill the jars according to the recipe with the uncooked food, if liquid is required it will be poured to the desired headspace. Using a plastic knife or canning bubble popper, run it down the inside of the jar against the glass to remove any air bubbles. Then top off the jar if needed with liquid to bring back up to recommended headspace. Wipe the rim of the jar with a damp clean cloth, using water if canning vegetables and if canning meats, use vinegar on the cloth to remove any fatty residue. Place the lids on the jars and only tighten the rings finger tight. Do not overtighten, as this will cause the lids to not be able to release pressure built up inside and the lid will buckle. This will compromise the seal on the jar.
Carefully place the jars in the canner and follow the directions in the recipe for processing time and pressure.


Hot Pack:
The hot pack method uses already cooked items for canning. Some vegetables such as potatoes need to be briefly par boiled before processing. Other foods, like ground meat, need to be cooked prior to processing due to the density factor and that ground beef would become a log of meat and not resemble anything like hamburger meat when used if it were processed uncooked. Hot packing is always recommended for broth and stock and many soups.
When hot packing, the water in the canner needs to be hot, not boiling, just hot enough you see the steam coming off of the water. I typically place the jars in the canner to warm up with the water, fill the jar with a bit of water to prevent it from tipping over. This will warm the jars and prevent a temperature shock when you fill with the hot food.
To hot pack, you will follow the recipe's directions for cooking the food you will be canning. Once the food is cooked, fill the warm jars to the recommended headspace. If you are hot packing a food that requires fresh hot liquid to be added, pour the liquid over the food in the jar to the recommended headspace. Use a plastic knife or a canning bubble popper to remove any bubbles and add more liquid if necessary to bring up to recommended headspace. Wipe the rim of the jar with a damp clean cloth, using water if canning vegetables and if canning meats, use vinegar on the cloth to remove any fatty residue. Place the lids on the jars and only tighten the rings finger tight. Do not overtighten, as this will cause the lids to not be able to release pressure built up inside and the lid will buckle. This will compromise the seal on the jar.
Carefully place the jars in the canner and follow the directions in the recipe for processing time and pressure.


Processing Procedure:
The processing procedure is basically the same regardless of what you are canning.
Once you have the jars filled, and lids on, gently place inside the canner. For pints, if you have a canner designed for stacking, they can be stacked for processing. Be sure not to squeeze the jars in so tight that it could risk breakage. Follow the manufacturer's instructions on how many jars will fit in your specific canner.
Once the jars are in the canner, fasten the lid securely, following manufacturer's instructions, and raise the heat on the canner. Once the canner has begun venting (see where the vent pipe is in above diagrams) you want to allow it to vent at full steam for 10 minutes. This is a very important part of building the correct pressure for processing within your canner.
After the canner has vented for the 10 minutes, it is time to add the weight. Check the recipe or the chart above to find your recommended pressure according to your elevation.
Allow the canner to come up to the recommended pressure, whether using an analog dial or adjustable weights. Then lower the heat slightly to keep it from rising more and set a timer for the recommended processing time. Be aware of the pressure on the canner, watch the dial or listen for the jiggling of the weights and adjust the heat if necessary. If the pressure on the canner EVER drops below the recommended pressure, the time MUST be started over. The food in the jars has to be at least at that pressure consistently for the recommended time, or it is not processed correctly.
Once the processing time is finished, turn off the heat (do not remove weight or move canner) and allow the pressure in the canner to lower naturally. Once there is no pressure (the cover lock on the lid will drop) then you can safely remove the weight. Allow the canner to sit undisturbed for another 10 minutes. Carefully open, but do not remove the lid of the canner, making sure to keep the opening pointed away from your face to avoid burns from the steam. Allow to sit for 5 more minutes, (this allows the jars to adjust to the pressure and prevents siphoning) then carefully remove jars with jar lifters and place on a counter that is covered with a towel. The towel buffers the jar from the temperature difference on the counter to prevent temperature shock to the jar, as well as protecting your counter.
Allow the jars to sit undisturbed for a minimum of 12 hours. After the 12 hours you can check the lids for seals. If the lid did not seal, the center of the lid will not be down. If you can push it down, it was not sealed and needs to be placed in the refrigerator for quick use. Some foods are safe to reprocess, using new lids, clean jars, and repeating the entire canning procedure over. If the lids sealed, then allow the jars to sit for another 12 hours before removing the rings, washing the jars and storing. This will allow the sealant in the lid to be completely ready for handling and prevent seals from coming undone.
After the jars are removed from the canner, allow the water to cool a bit before moving. Carefully pour out the water, wash and rinse the canner and lid before storing. Never store the canner with the lid secured, rather, turn the lid upside down and place on the canner. This will help by allowing the canner to ventilate during storage, and by allowing the seal in the lid to relax before the next canning session.


Canning Terms:
There have been several terms used in this post that you may not understand what they mean, let me explain a few.
Siphoning: Refers to when liquid inside the jar is forced outside by a drastic change in pressure or temperature. If siphoning occurs, check the liquid level within the jar. If it is less than 50% full, the jar needs to be refrigerated for quick use. If the liquid level is over 50%, and the food is exposed out of the liquid, place towards the front in your storage for using first.
Temperature Shock: Refers to when a jar that is either hot or cold comes in contact with a surface that is the opposite in temperature. This can often cause jar breakage.
Venting: Refers to allowing the steam in the canner to escape the vent pipe for 10 minutes to allow all extra air to escape the canner before processing.
Jar Lifters: Refers to the large tong like tools used to safely remove hot jars from the canner.
Headspace: Refers to the amount of space recommended from the top of the food being processed and the top of the jar. Headspace is important to observe, as it effects the safety of the food within the jar.
For more information about pressure canning, and other forms of food preservation, visit:
https://nchfp.uga.edu The National Center for Home Food Preservation
Add comment
Comments